绕过爱奇艺libmsaoaidsec.so的Frida检测
本文中所有内容仅供研究与学习使用,请勿用于任何商业用途和非法用途,否则后果自负!
下面主要分析了如何定位Frida检测位置,以及定位后如何绕过的问题。其原理参见之前写的libcHook
0x00:环境
设备:Google Pixel 5
系统版本:Android 13
版本号:TQ2A.230405.003.B2
Frida-Server:16.2.1
爱奇艺:15.7.5
0x01:问题
爱奇艺有反Frida机制,在我们使用Frida启动App的时候进程会被干掉
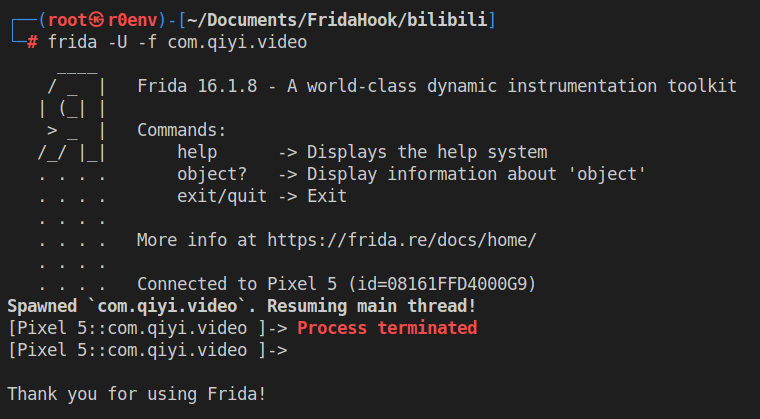
0x02:分析
Frida检测一般都是在Native层实现的,那么我们首先需要定位检测机制是在哪个so中实现的,这里我们就需要先hook Android的动态链接库加载函数,观察它加载到哪个so的时候会崩溃

hook android_dlopen_ext查看so的加载流程
function hook_dlopen() {
    Interceptor.attach(Module.findExportByName(null, "android_dlopen_ext"),
        {
            onEnter: function (args) {
                this.fileName = args[0].readCString()
                console.log(`dlopen onEnter: ${this.fileName}`)
            }, onLeave: function(retval){
                console.log(`dlopen onLeave fileName: ${this.fileName}`)
                if(this.fileName != null && this.fileName.indexOf("libmsaoaidsec.so") >= 0){
                    let JNI_OnLoad = Module.getExportByName(this.fileName, 'JNI_OnLoad')
                    console.log(`dlopen onLeave JNI_OnLoad: ${JNI_OnLoad}`)
                }
            }
        }
    );
}

setImmediate(hook_dlopen)
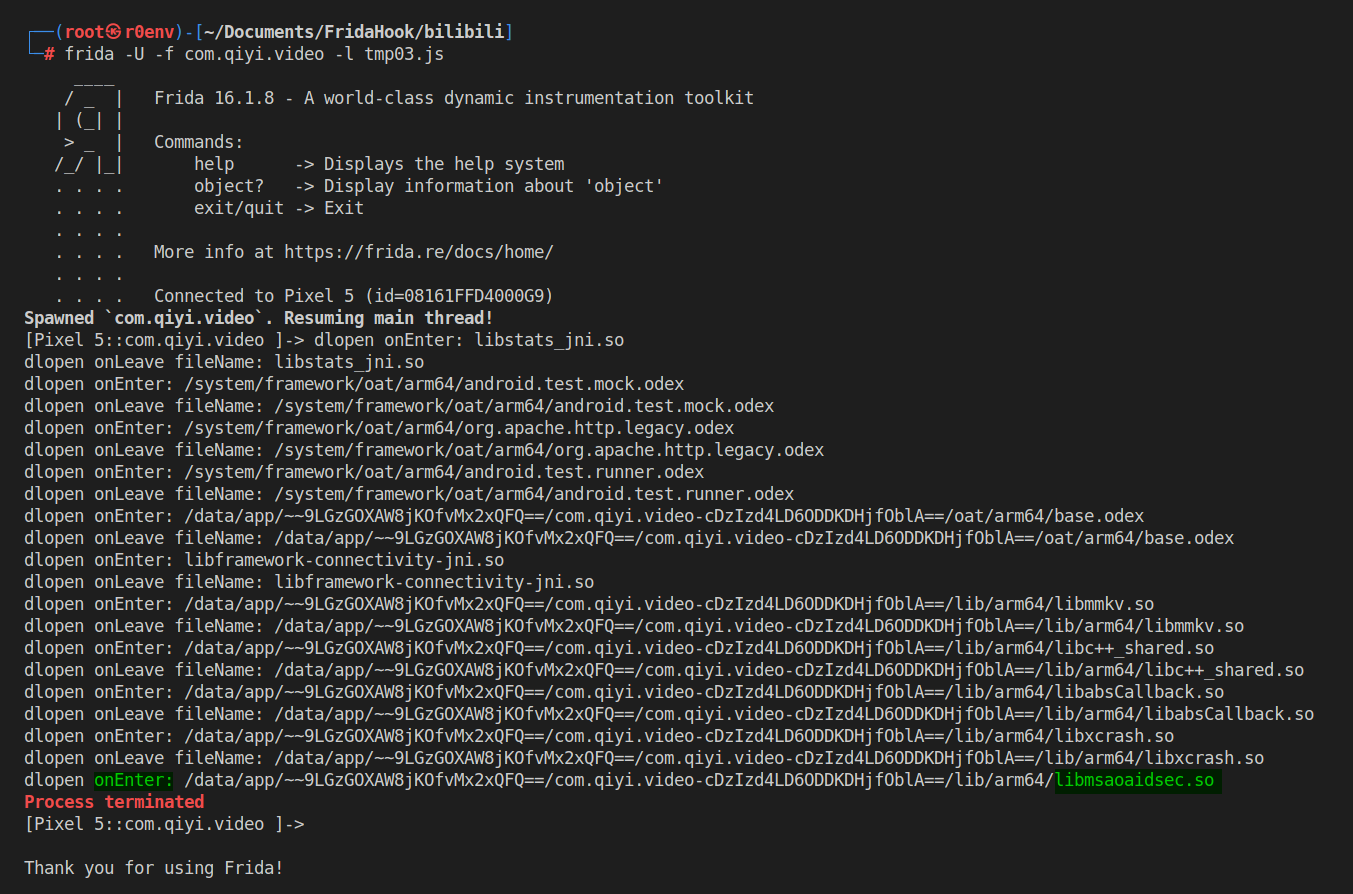
- 从打印的log可以看到最后一个加载的so是
libmsaoaidsec.so,并且没有调用onLeave,由此可知崩溃点就在libmsaoaidsec.so中,并且是在JNI_OnLoad之前检测的,so在加载之后会先调用.init_proc函数,接着调用.init_array中的函数,最后才是JNI_OnLoad函数,所以根据log可以确定检测点在JNI_OnLoad之前,接下来选择的注入时机可以选择在dlopen加载libmsaoaidsec.so之后
需要注意的一点是在dlopen函数调用完成之后.init_xxx已经执行完成了

- 那么我们就hook这里的
call_constructors函数,在onEnter里注入代码
在设备中找到call_constructors的offset
readelf -sW /apex/com.android.runtime/bin/linker64 | grep call_constructors

function hook_linker_call_constructors() {
    let linker64_base_addr = Module.getBaseAddress('linker64')
    let offset = 0x4e4dc    // __dl__ZN6soinfo17call_constructorsEv
    let call_constructors = linker64_base_addr.add(offset)
    let listener = Interceptor.attach(call_constructors,{
        onEnter:function(args){
            console.log('hook_linker_call_constructors onEnter')
            let secmodule = Process.findModuleByName("libmsaoaidsec.so")
            if (secmodule != null){
                // do something
            }
        }
    })
}
确定hook点了之后,接下来定位具体的Frida检测点
对Frida的检测通常会使用openat、open、strstr、pthread_create、snprintf、sprintf、readlinkat等一系列函数
hook pthread_create 定位检测点
我们这里对pthread_create进行hook,打印新线程要执行的函数地址
function hook_pthred_create(){
    console.log("libmsaoaidsec.so --- " + Process.findModuleByName("libmsaoaidsec.so").base)
    Interceptor.attach(Module.findExportByName('libc.so','pthread_create'),{
        onEnter(args){
            let func_addr = args[2]
            console.log(`The thread Called function address is: ${func_addr}`)
        }
    })
}
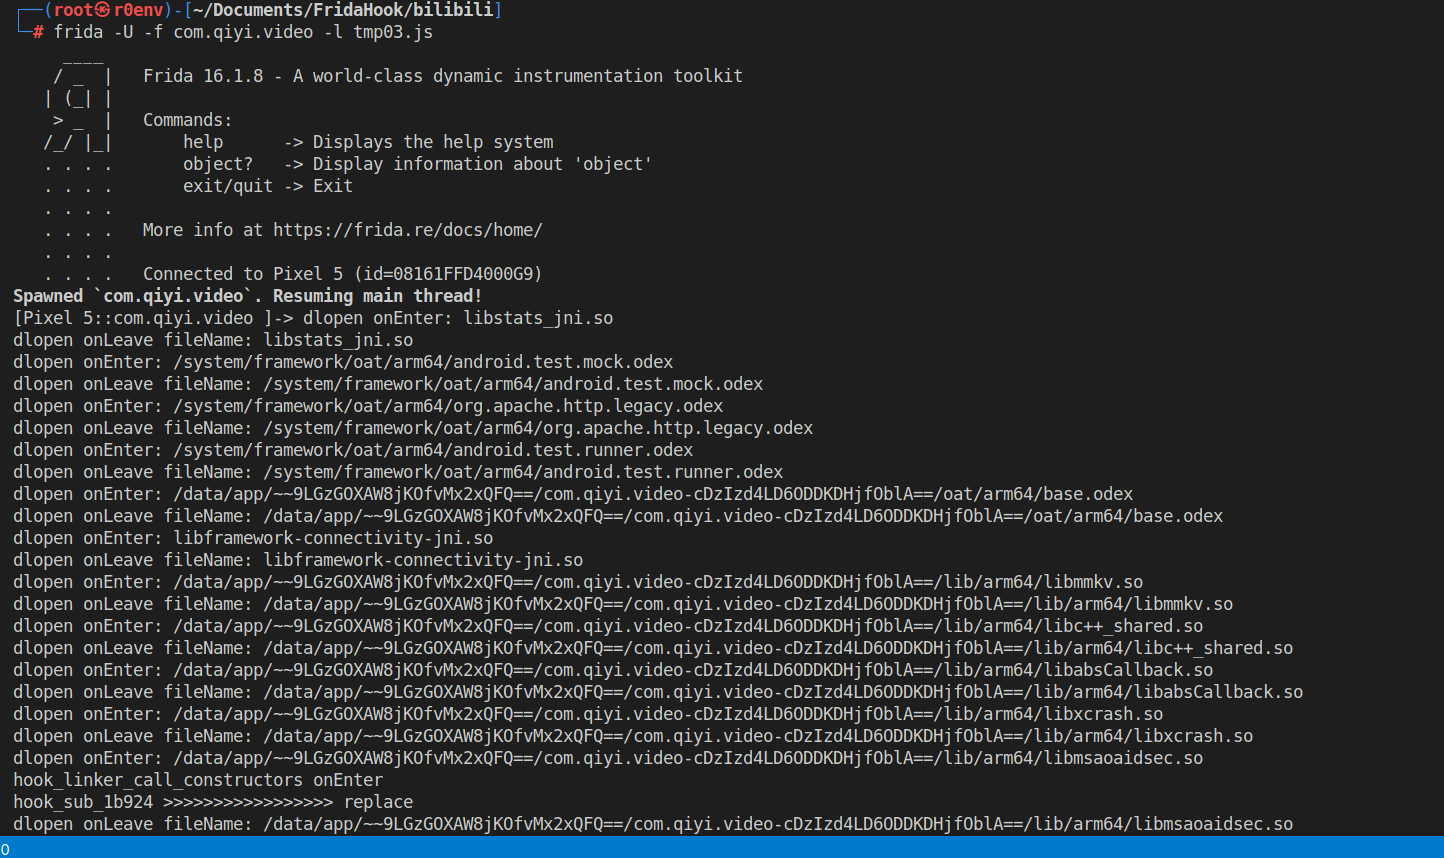
执行脚本:frida -U -f com.qiyi.video -l tmp03.js
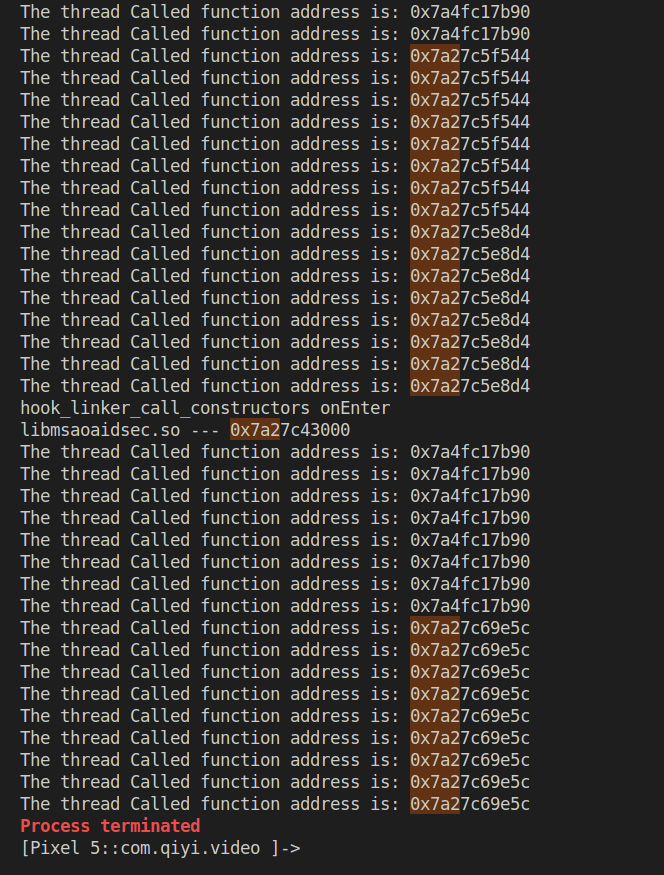
根据打印的结果可以看到有两个线程是libmsaoaidsec.so创建的
计算对应的偏移:
libmsaoaidsec.so — 0x7a27c43000
The thread Called function address is: 0x7a27c5e8d4 偏移-> 1B8D4
The thread Called function address is: 0x7a27c69e5c 偏移-> 26E5C
既然libmsaoaidsec.so创建了两个线程,猜测这其中起码有一个是和Frida检测有关的
用IDA打开libmsaoaidsec.so,查找偏移
查看0x1B8D4地址处对应的函数
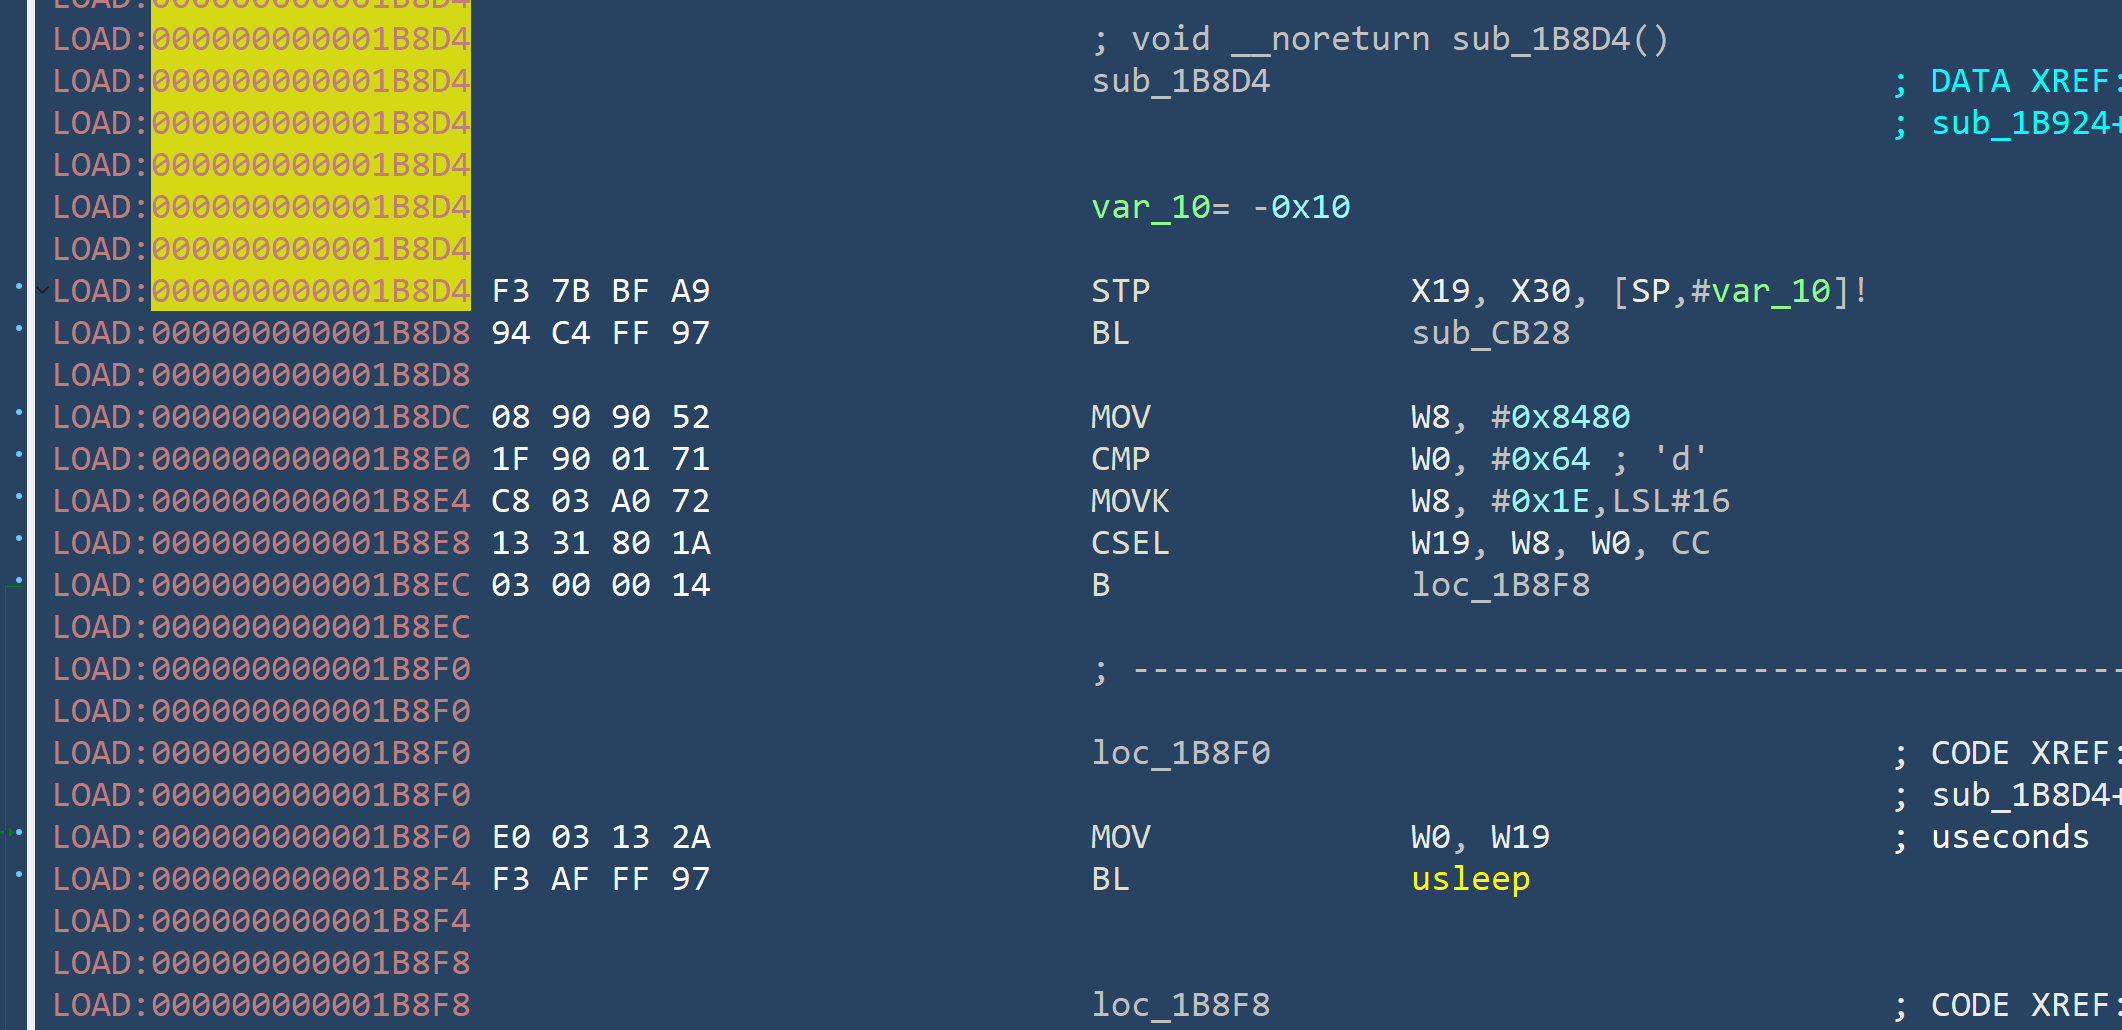
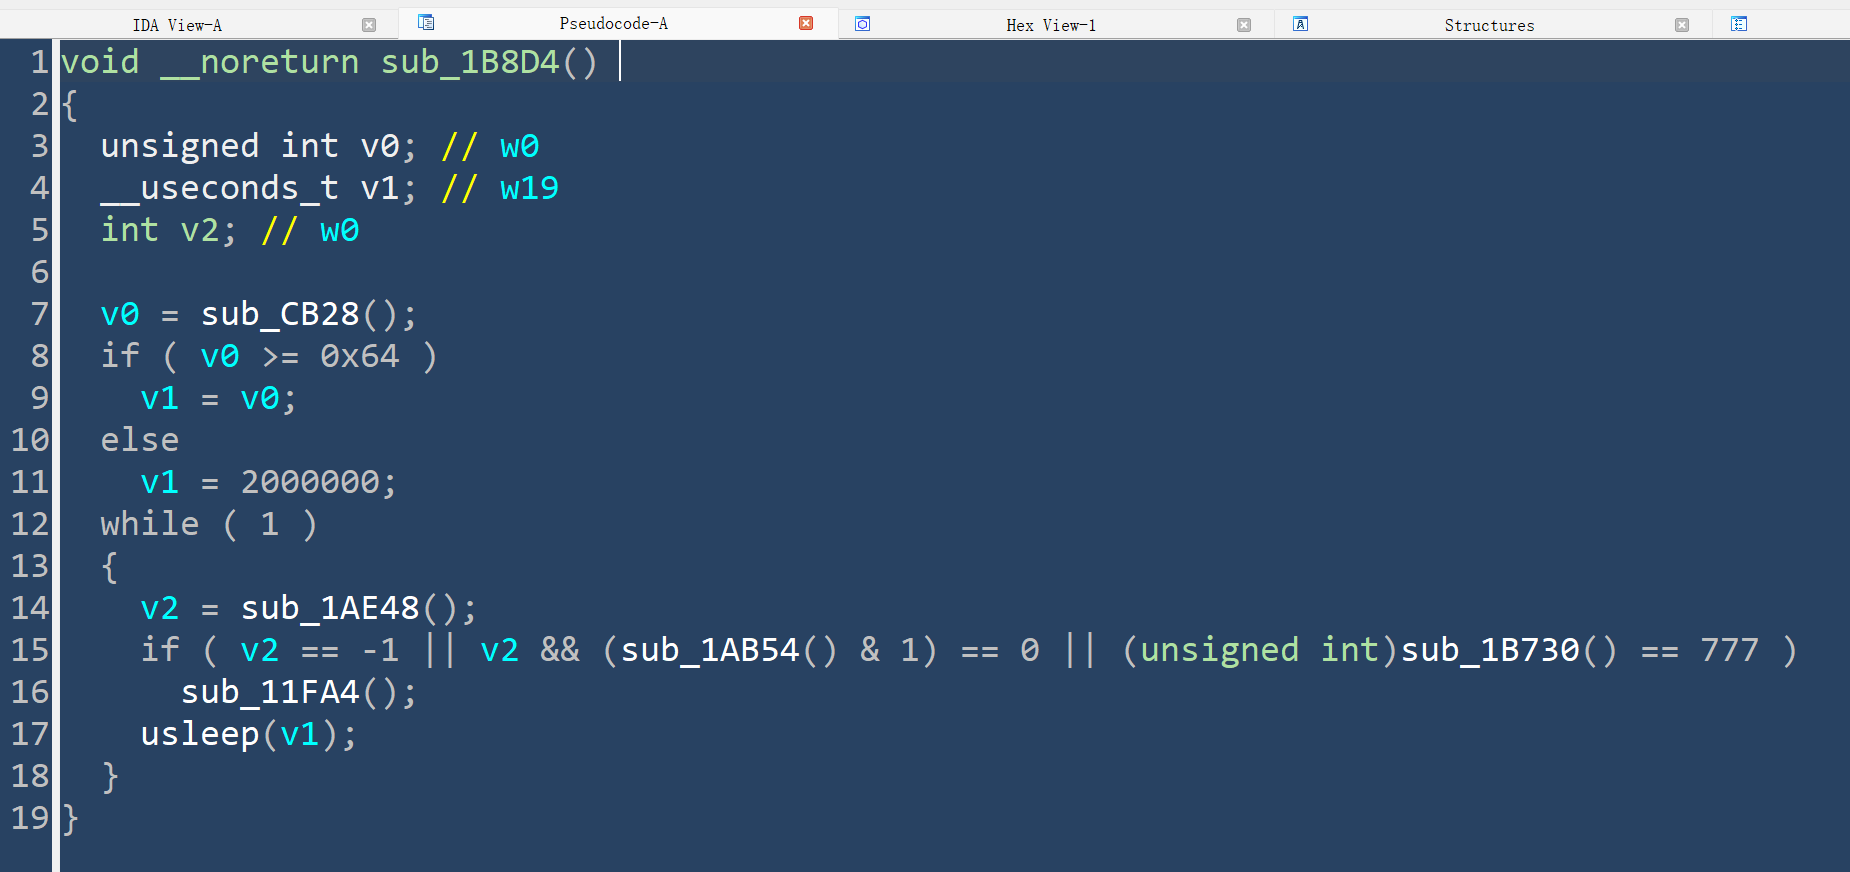
- 使用交叉引用往上查找
到了上一层,这里的v26应该就是pthred_create了
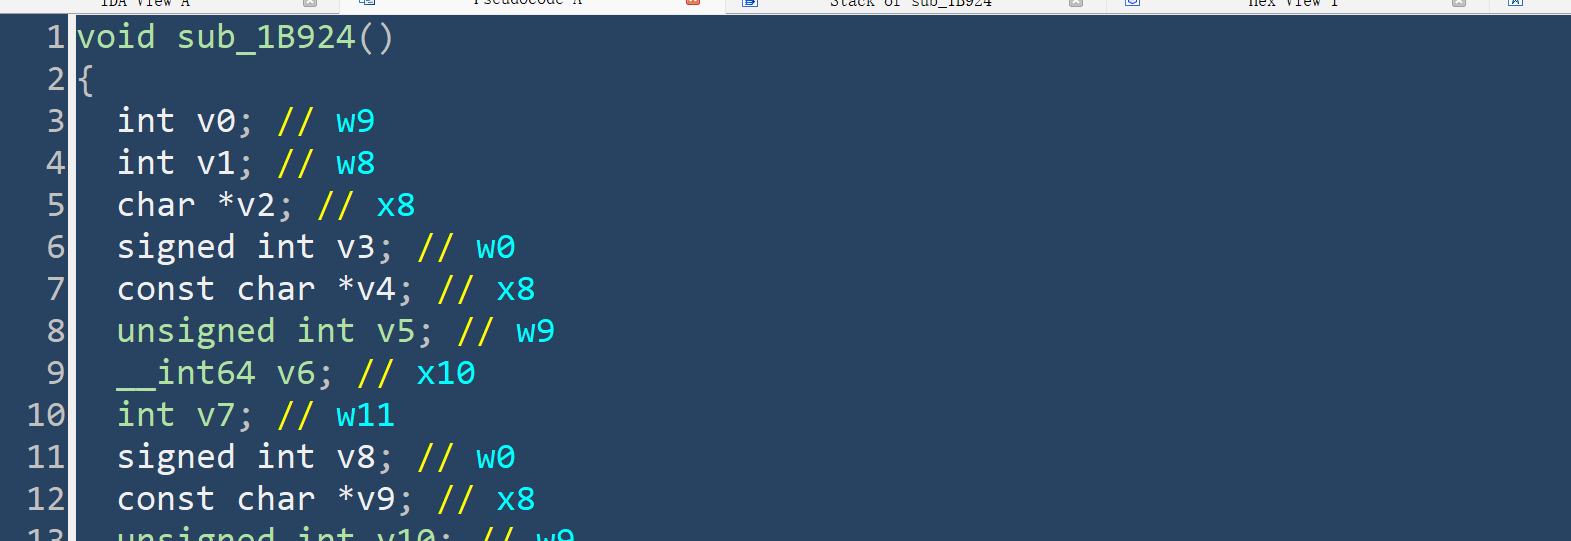
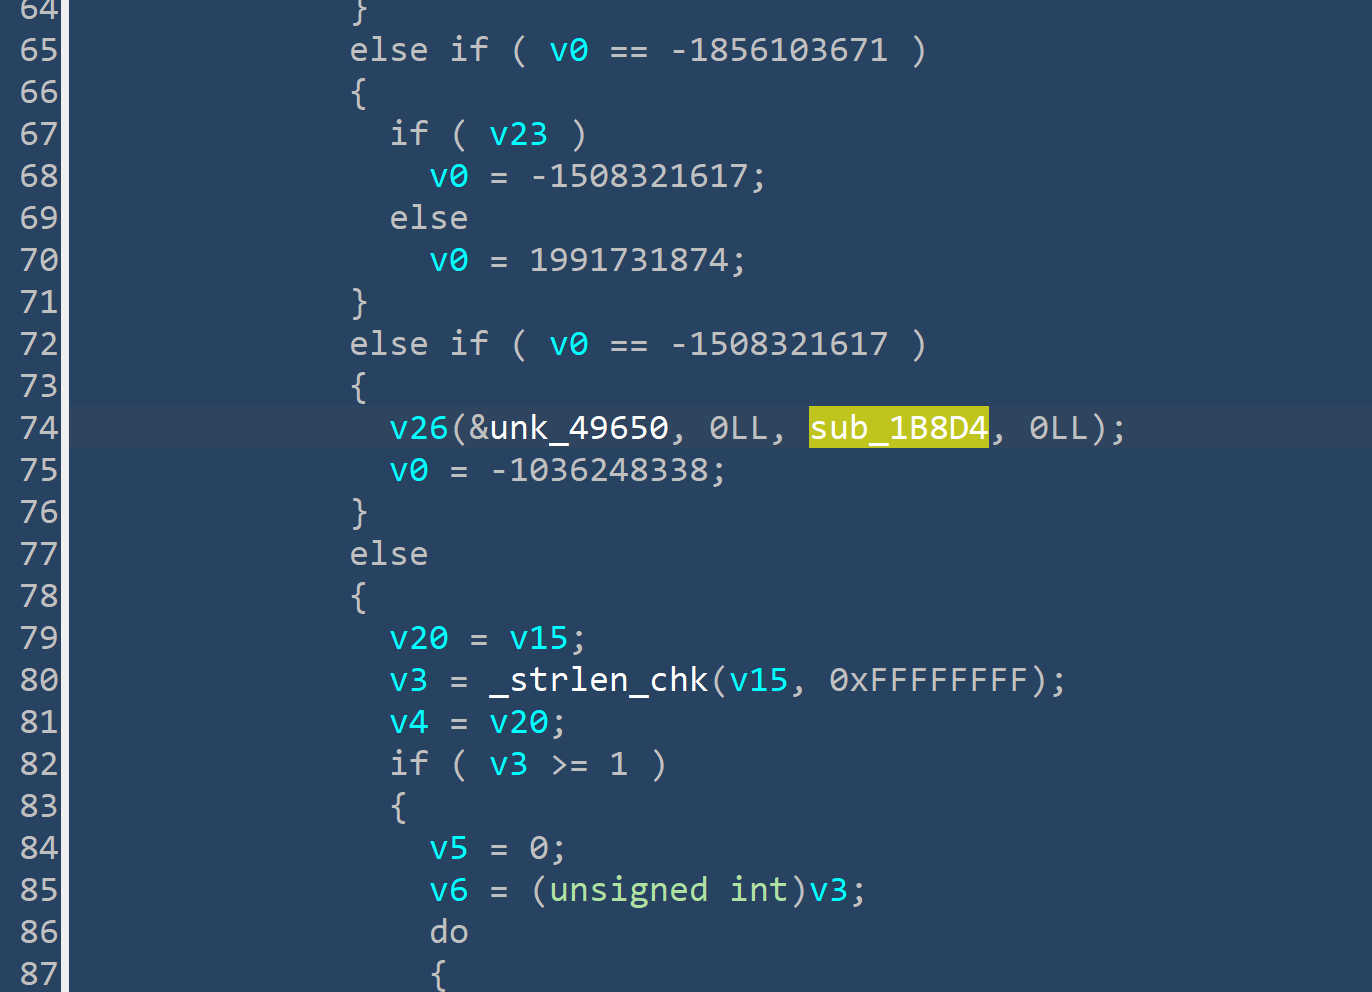
这里绕过的方法很简单,可以选择直接nop掉pthread_create或者替换检测函数的代码逻辑都可以,我们这里选择replace掉sub_1b924
0x03:最终代码
function hook_dlopen() {
    Interceptor.attach(Module.findExportByName(null, "android_dlopen_ext"),
        {
            onEnter: function (args) {
                this.fileName = args[0].readCString()
                console.log(`dlopen onEnter: ${this.fileName}`)
                if (this.fileName !== undefined && this.fileName.indexOf("libmsaoaidsec.so") >= 0) {
                    hook_linker_call_constructors()
                }
            }, onLeave: function (retval) {
                console.log(`dlopen onLeave fileName: ${this.fileName}`)
                if (this.fileName != null && this.fileName.indexOf("libmsaoaidsec.so") >= 0) {
                    let JNI_OnLoad = Module.getExportByName(this.fileName, 'JNI_OnLoad')
                    console.log(`dlopen onLeave JNI_OnLoad: ${JNI_OnLoad}`)
                }
            }
        }
    );
}

function hook_linker_call_constructors() {
    let linker64_base_addr = Module.getBaseAddress('linker64')
    let offset = 0x4e4dc    // __dl__ZN6soinfo17call_constructorsEv
    let call_constructors = linker64_base_addr.add(offset)
    let listener = Interceptor.attach(call_constructors,{
        onEnter:function(args){
            console.log('hook_linker_call_constructors onEnter')
            let secmodule = Process.findModuleByName("libmsaoaidsec.so")
            if (secmodule != null){
                // do something
                // hook_pthred_create()
                hook_sub_1b924()
                listener.detach()
            }
        }
    })
}

function hook_pthred_create(){
    console.log("libmsaoaidsec.so --- " + Process.findModuleByName("libmsaoaidsec.so").base)
    Interceptor.attach(Module.findExportByName('libc.so','pthread_create'),{
        onEnter(args){
            let func_addr = args[2]
            console.log(`The thread Called function address is: ${func_addr}`)
        }
    })
}

function hook_sub_1b924() {
    let secmodule = Process.findModuleByName("libmsaoaidsec.so")
    Interceptor.replace(secmodule.base.add(0x1B924), new NativeCallback(function () {
      console.log(`hook_sub_1b924 >>>>>>>>>>>>>>>>> replace`)
    }, 'void', []));
  }

setImmediate(hook_dlopen)
0x04:另一种定位方法
通过栈回溯的方式来定位Frida检测点
这里我们的思路是:
既然挂上Frida就会退出,那么我们就来分析最终是调用了哪个系统调用导致的退出,找到之后再通过栈回溯定位到Frida检测点
- 使用
sleep让进程暂停在加载了libmsaoaidsec.so处- 使用工具
strace监控系统调用- 找到系统调用后,通过栈回溯定位检测点
01:定位kill进程调用
    function hookDlopen() {
        let Func_sleep = new NativeFunction(Module.getExportByName('libc.so', 'sleep'), 'uint', ['uint'])
        let linker64_base_addr = Module.getBaseAddress('linker64')
        let offset = 0x3b6ec // __dl__Z9do_dlopenPKciPK17android_dlextinfoPKv
        let android_dlopen_ext = linker64_base_addr.add(offset)
        Interceptor.attach(android_dlopen_ext, {
            onEnter: function (args) {
                this.name = args[0].readCString()
                console.log(`Current PID: ${Process.id}`)
                console.log(`dlopen onEnter ${this.name}`)
                if (this.name != null && this.name.indexOf('libmsaoaidsec.so') >= 0) {
                    Func_sleep(10)
                    // hook_mmap()
                }
            }, onLeave: function (retval) {
                console.log(`dlopen onLeave name: ${this.name}`)
            }
        })
    }
执行:
frida -U -f com.qiyi.video -l tmp01.js
图9
趁着进程暂停在Func_sleep(10)立即去执行:
strace -e trace=process -i -f -p 20014
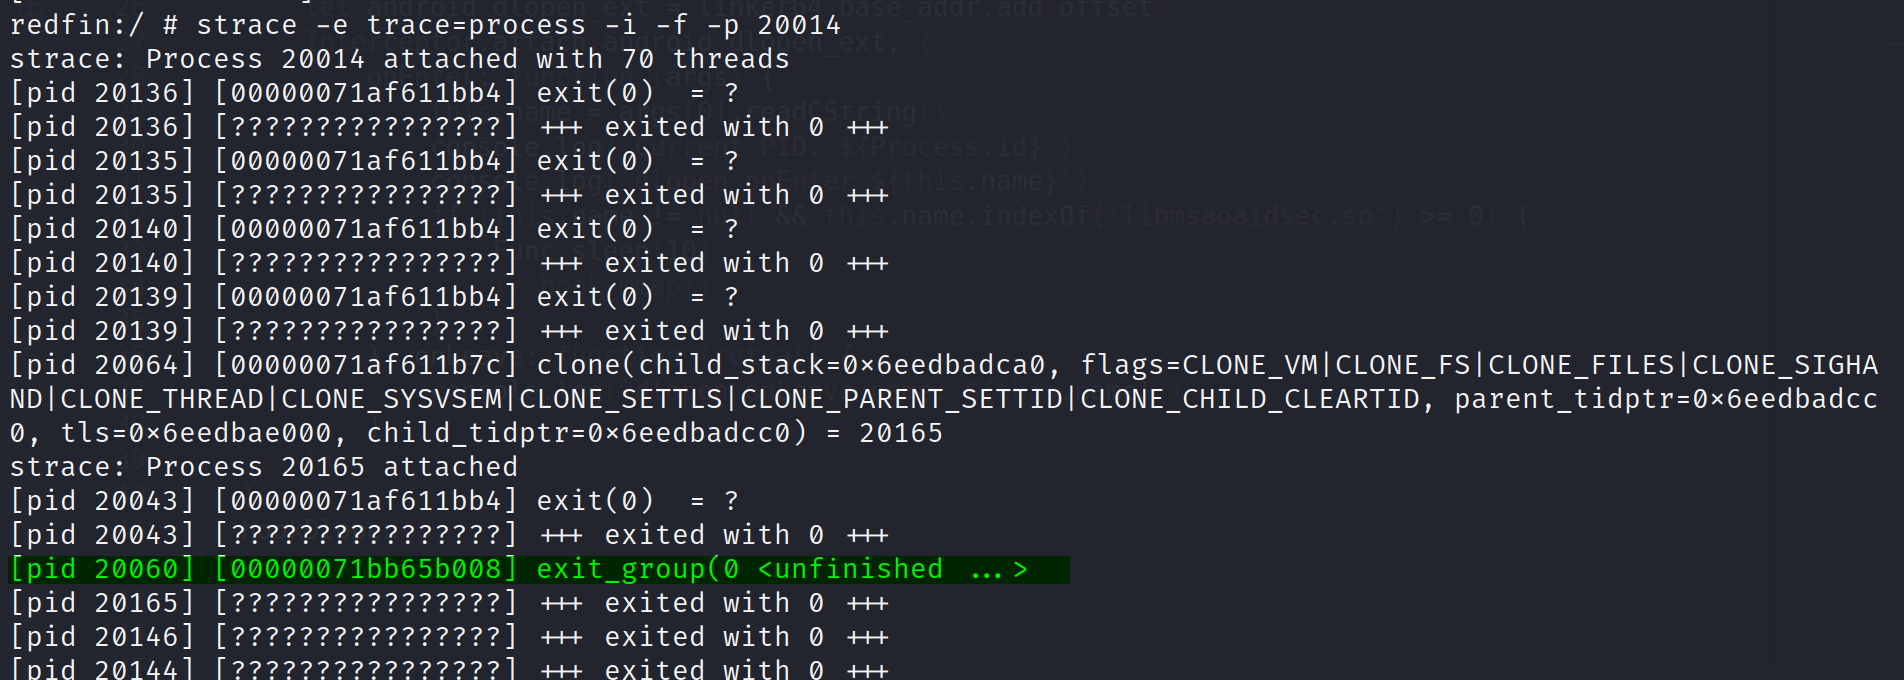
- 查看标记出来这一行,显示
20060线程是在地址0x00000071bb65b008处调用exit_group退出的
通过proc/pid/maps libc查看libc.so的地址范围
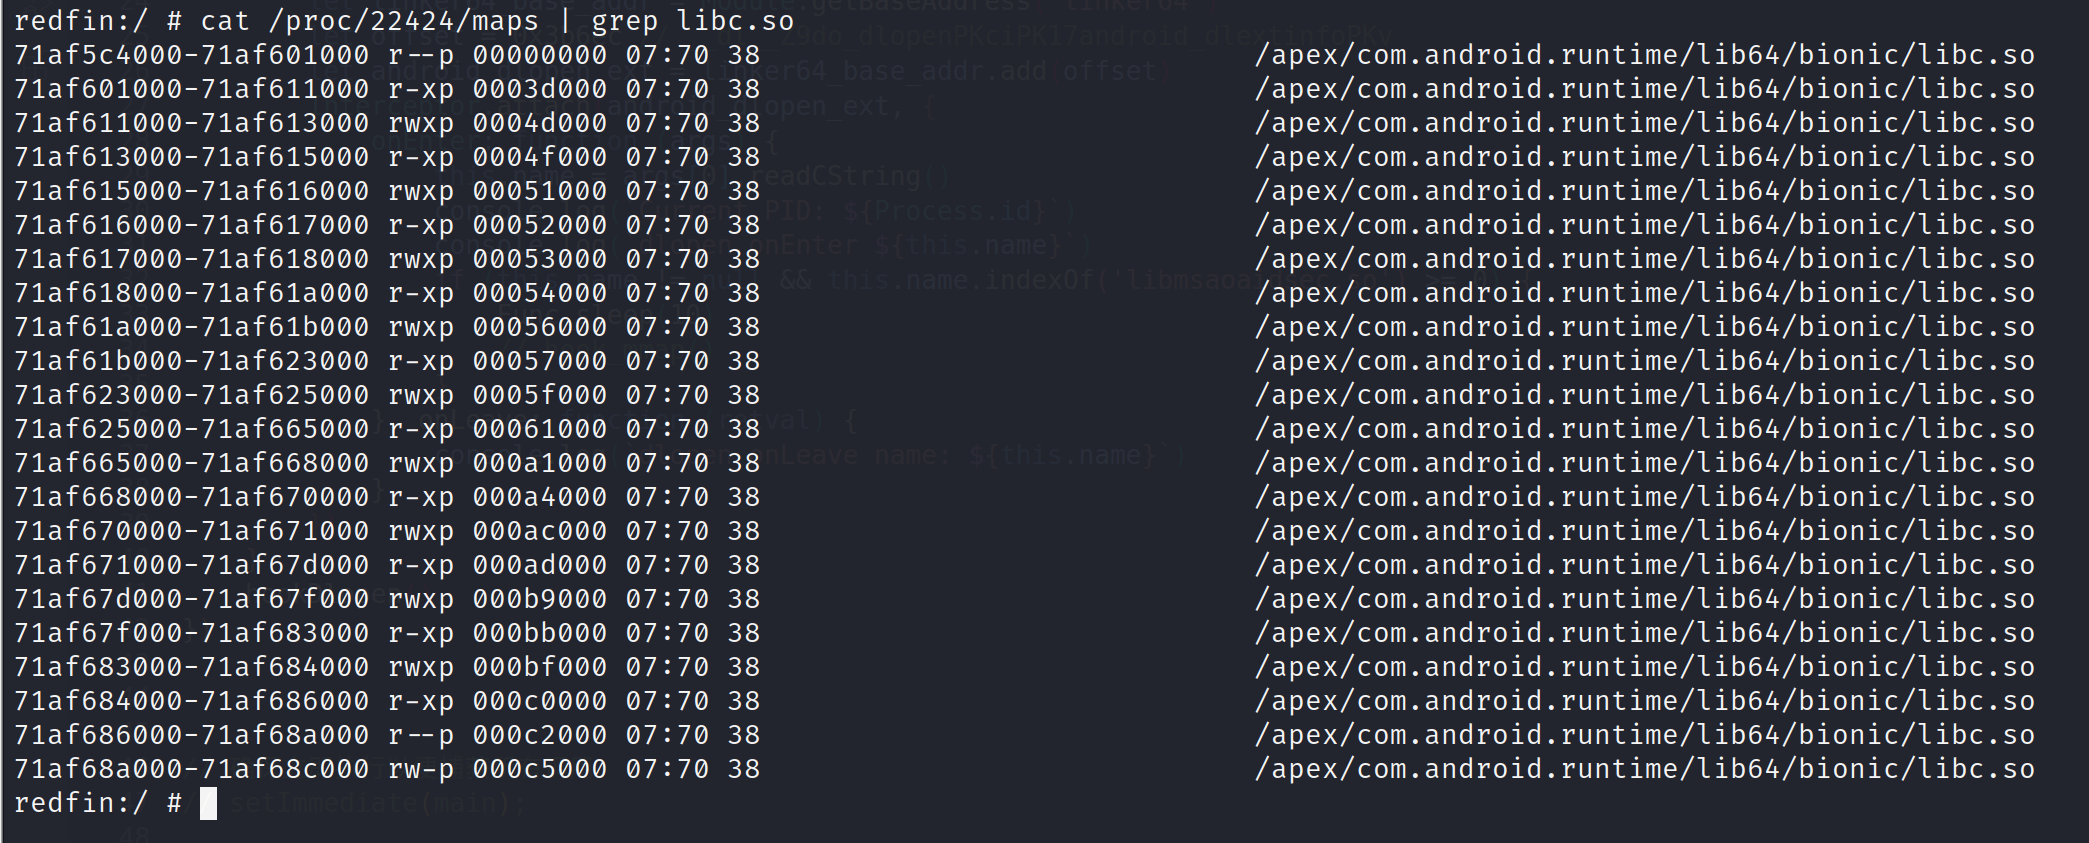
- 在一般情况下,
exit_group的调用是通过libc.so提供的接口函数调用的,而这里调用exit_group的地址范围不在libc中,说明exit_group没有通过标准库来调用。那么大概率是使用了动态分配的内存区域或者自定义加载的库
02:获取kill进程的调用栈
使用动态调用的话就涉及到内存的动态分配
接下来使用与刚才相同的方法让进程sleep,使用strace来监控与内存相关的系统调用
strace -e trace=process,memory -i -f -p pid

- 根据这两行可以看出来
exit_group的地址来自于mmap申请的28字节空间
从mmap的地址0x00000071af666878可以看出来它是libc.so中的函数,那么接下来可以hook mmap方法,打印其调用栈
    function hook_mmap() {
        var mmap_addr = Module.findExportByName("libc.so", "mmap")
        console.log("mmap_addr ==>", mmap_addr)
        Interceptor.attach(mmap_addr, {
            onEnter: function (args) {
                // console.log("args ==> ",)
                var length = args[1].toInt32()
                if (length === 28) {
                    console.log(`mmap length: ${length}`)
                    console.log('backtrace:\n' + Thread.backtrace(this.context, Backtracer.ACCURATE).map(DebugSymbol.fromAddress).join("\n") + '\n');

                    console.log("this.context ==> ", JSON.stringify(this.context))  // 有点奇怪,这行代码必须要加上栈回溯才能正常输出。应该是Frida版本的问题

                }
            }
        })
    }
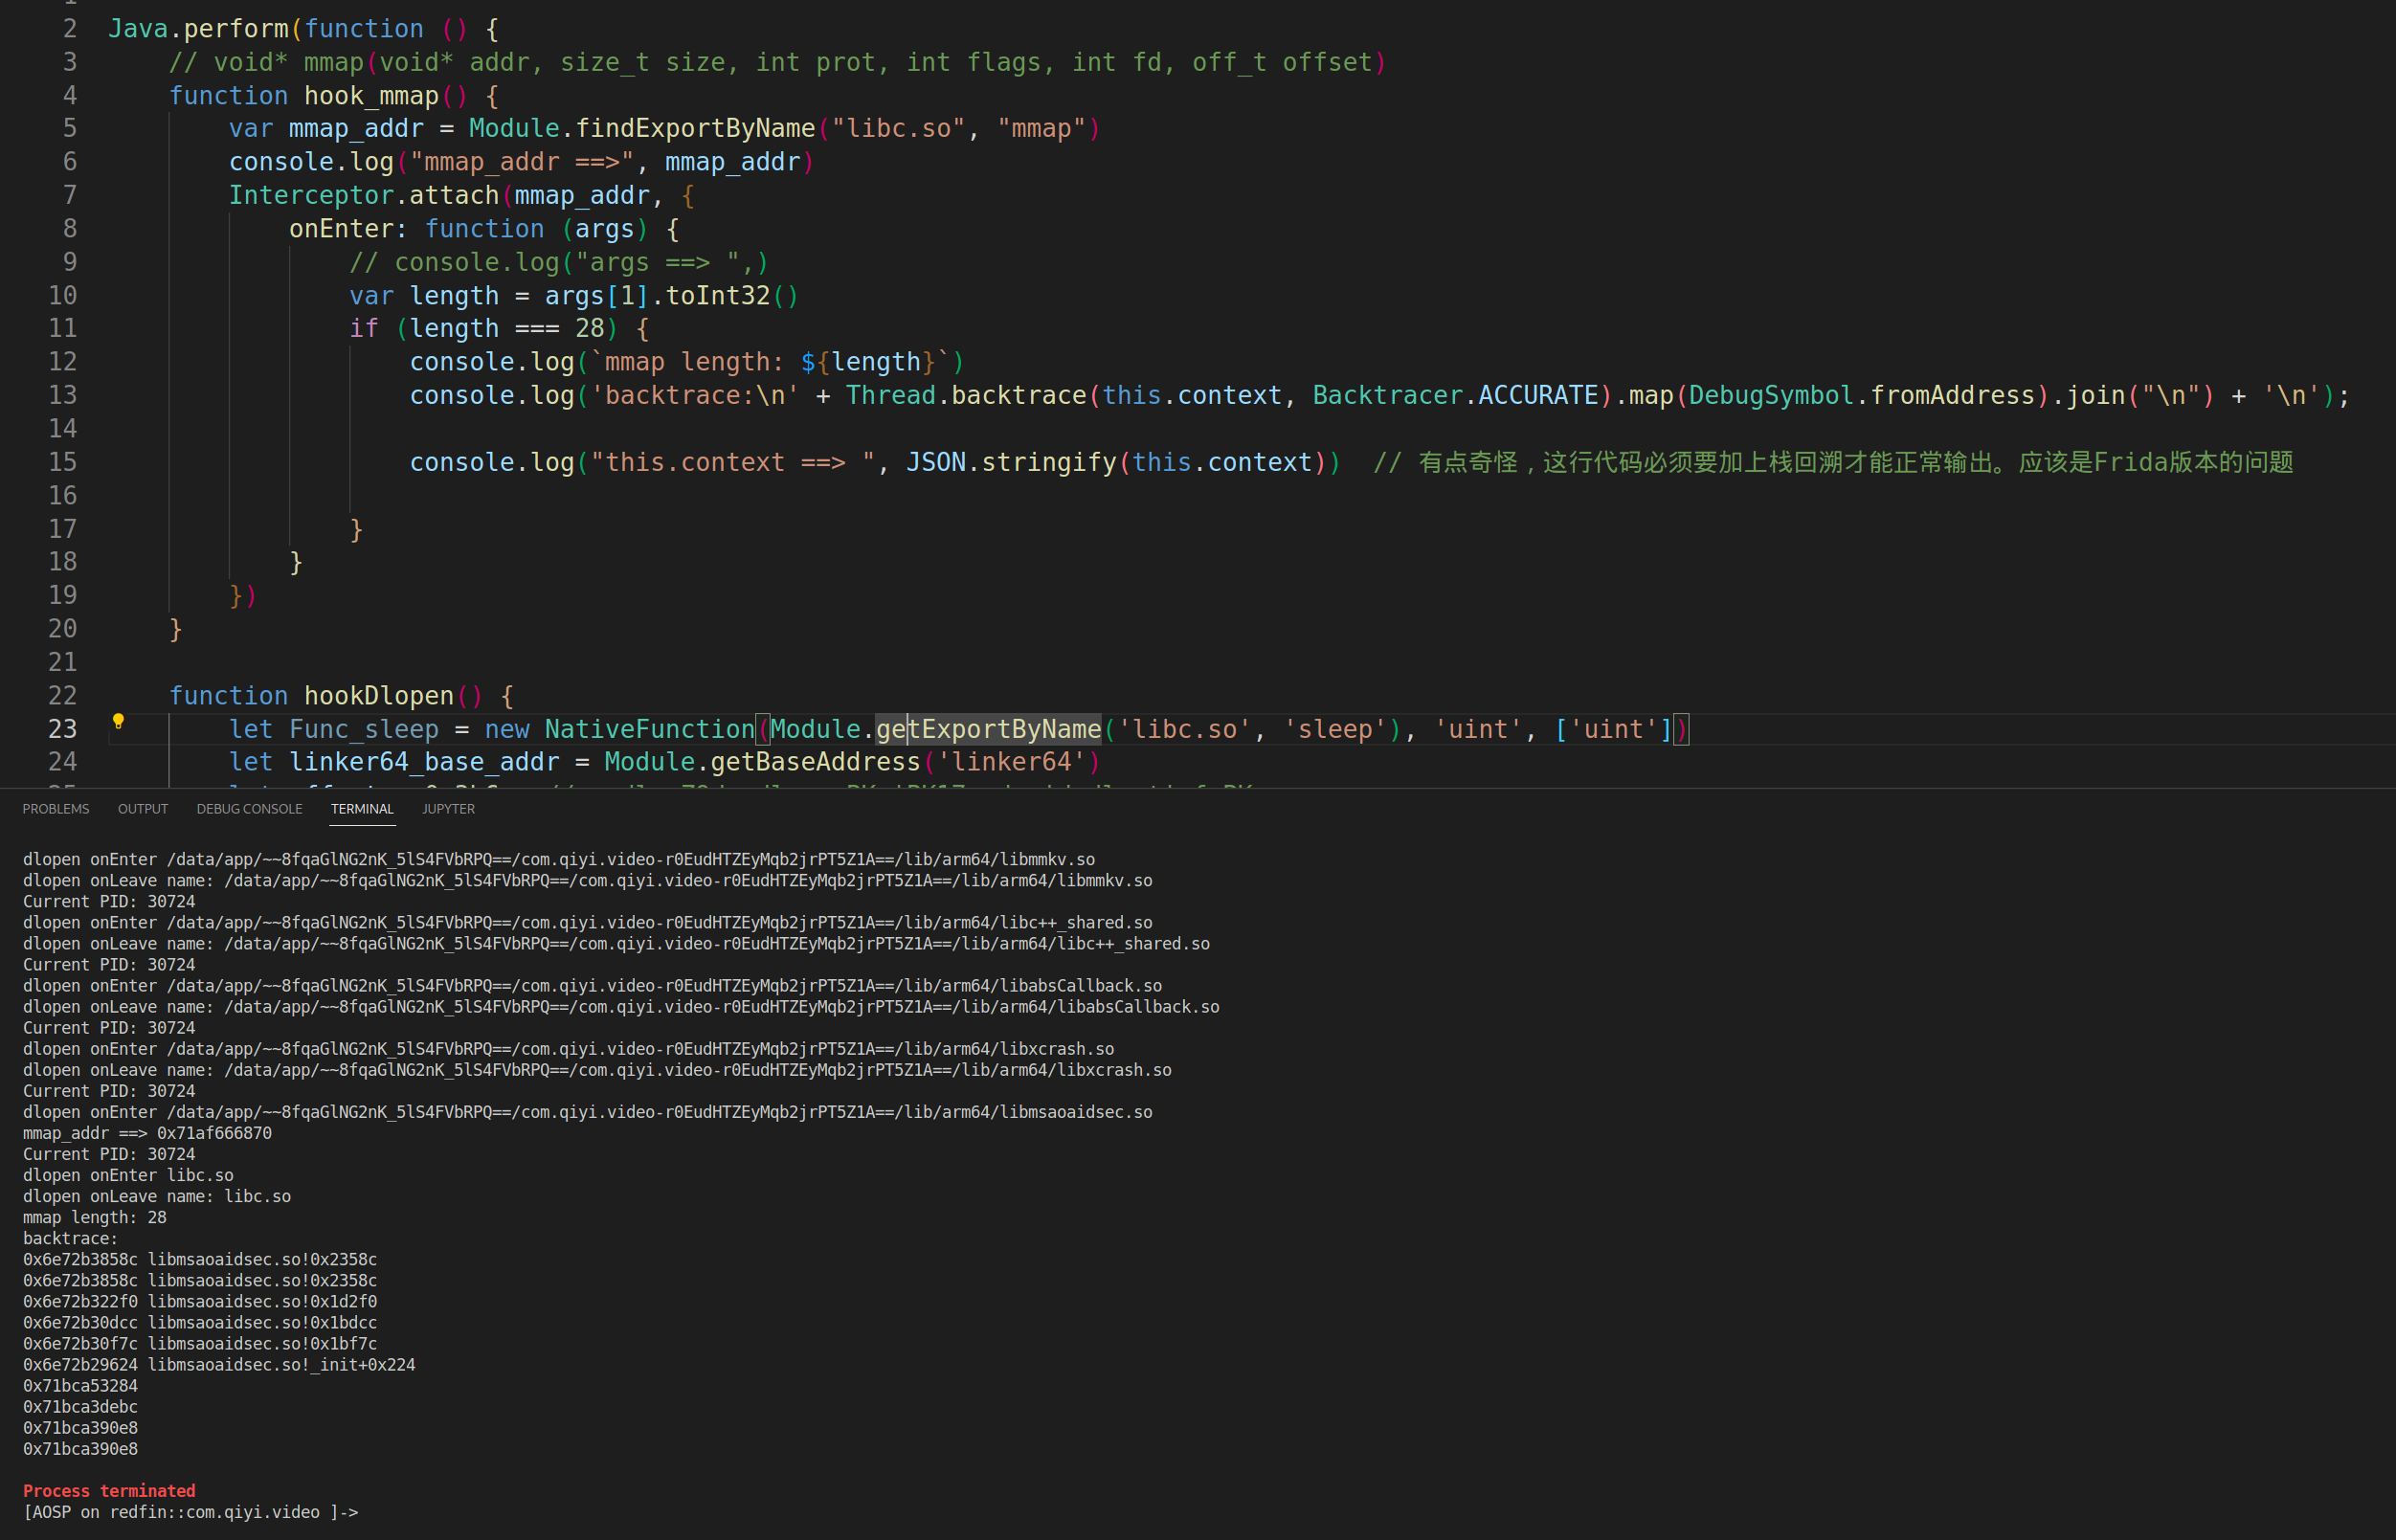
- 成功的打印出了调用栈
03:在IDA中定位检测函数
用IDA打开libmsaoaidsec.so并跳转到栈回溯位置

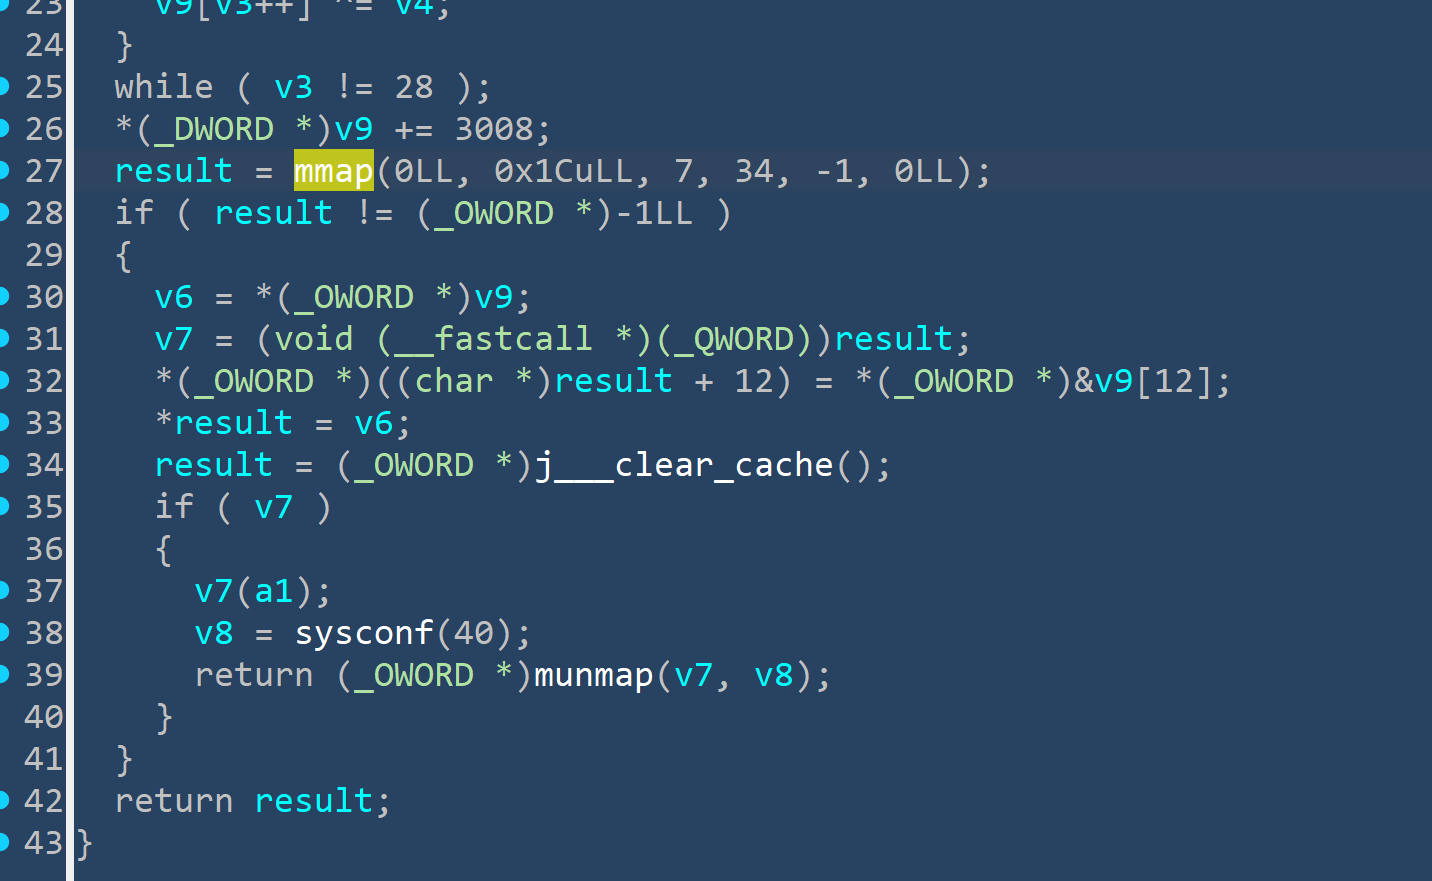
- F5之后粗略看一下代码,确实跟我们之前监控内存调用的执行流程相同
那我们就根据交叉引用继续往上回溯找到整个检测逻辑的位置
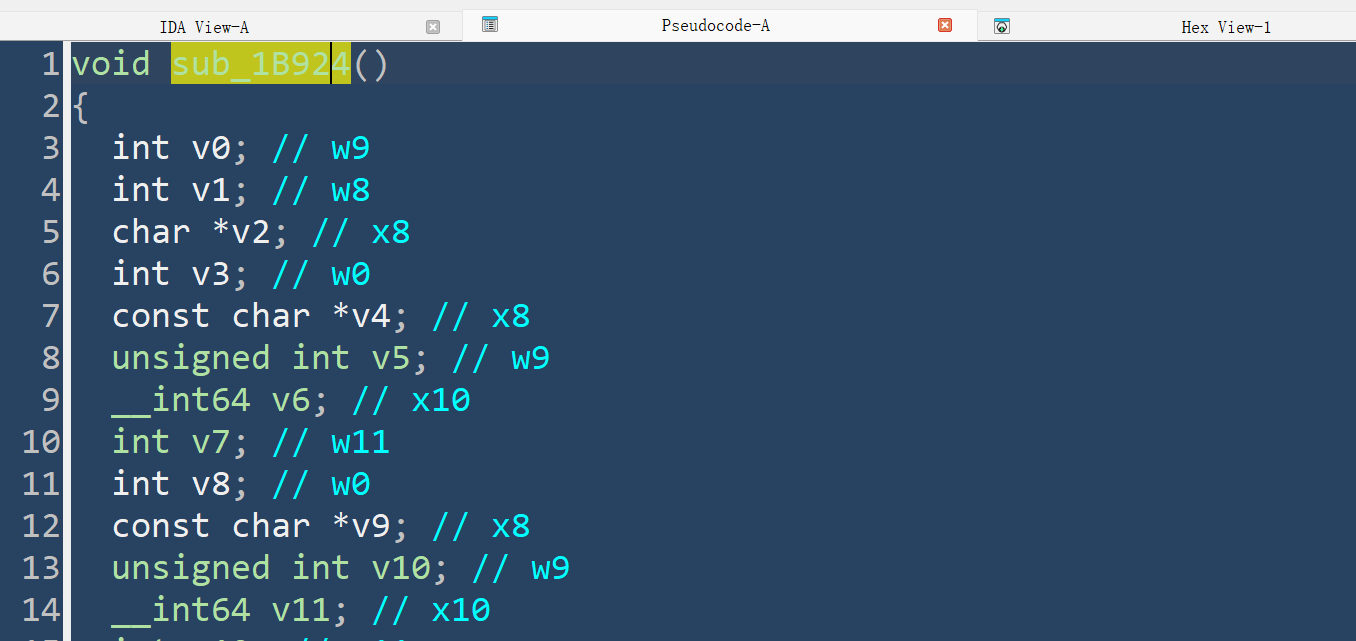
- 最后定位到了
sub_1B924这个函数是整个检测逻辑所在
04:CODE
那么接下来我们还是通过hook call_constructors方法,在加载到libmsaoaidsec.so时替换掉其中偏移0x1B924处的函数
Java.perform(function () {
    // void* mmap(void* addr, size_t size, int prot, int flags, int fd, off_t offset)
    function hook_mmap() {
        var mmap_addr = Module.findExportByName("libc.so", "mmap")
        console.log("mmap_addr ==>", mmap_addr)
        Interceptor.attach(mmap_addr, {
            onEnter: function (args) {
                // console.log("args ==> ",)
                var length = args[1].toInt32()
                if (length === 28) {
                    console.log(`mmap length: ${length}`)
                    console.log('backtrace:\n' + Thread.backtrace(this.context, Backtracer.ACCURATE).map(DebugSymbol.fromAddress).join("\n") + '\n');

                    console.log("this.context ==> ", JSON.stringify(this.context))  // 有点奇怪,这行代码必须要加上栈回溯才能正常输出。应该是Frida版本的问题

                }
            }
        })
    }

    function hook_linker_call_constructors(){
        let linker64_base_addr = Module.findBaseAddress("linker64")
        let offset = 0x510cc    // __dl__ZN6soinfo17call_constructorsEv
        let call_consturctors = linker64_base_addr.add(offset)
        let listener = Interceptor.attach(call_consturctors,{
            onEnter:function(args){
                console.log("hook_linker_call_constructors onEnter")
                let secmodule = Process.findModuleByName("libmsaoaidsec.so")
                if(secmodule != null){
                    hook_sub_1B924(secmodule)
                    listener.detach()
                }
            }
        })
    }

    function hook_sub_1B924(secmodule){
        Interceptor.replace(secmodule.base.add(0x1B924),new NativeCallback(function(){
            console.log("hook_sub_1B924 =====> replace")
        },"void",[]))
    }

    function hookDlopen() {
        let Func_sleep = new NativeFunction(Module.getExportByName('libc.so', 'sleep'), 'uint', ['uint'])
        let linker64_base_addr = Module.getBaseAddress('linker64')
        let offset = 0x3b6ec // __dl__Z9do_dlopenPKciPK17android_dlextinfoPKv
        let android_dlopen_ext = linker64_base_addr.add(offset)
        Interceptor.attach(android_dlopen_ext, {
            onEnter: function (args) {
                this.name = args[0].readCString()
                console.log(`Current PID: ${Process.id}`)
                console.log(`dlopen onEnter ${this.name}`)
                if (this.name != null && this.name.indexOf('libmsaoaidsec.so') >= 0) {
                    // Func_sleep(10)
                    // hook_mmap()
                    hook_linker_call_constructors()
                }
            }, onLeave: function (retval) {
                console.log(`dlopen onLeave name: ${this.name}`)
            }
        })
    }
    hookDlopen()
})
后记:
libmsaoaidsec.so这个库用的还挺普遍的,bilibili也使用了相同的检测方式
