编译Android13-AOSP
本文主要是下载Android13 AOSP源码,并将其编译后刷入设备
环境:
编译环境:Ubuntu 22.04 TLS,需要配置好科学上网
硬盘最少要300G以上,内存最少要16G以上
源码下载和编译都比较花时间
在12个线程的情况下给20G内存就足够了,太多了也用不到

设备:pixel 5
其他配置
1. 安装 Repo 工具
Repo 工具用于管理 Git 仓库
mkdir ~/bin
curl https://storage.googleapis.com/git-repo-downloads/repo > ~/bin/repo
chmod a+x ~/bin/repo
2. 设置 Java 环境
确保安装的是 OpenJDK 11:
sudo update-alternatives --config java
sudo update-alternatives --config javac
如果还未安装 OpenJDK 11,可以通过以下命令安装:
sudo apt install openjdk-11-jdk
3. 安装依赖:
sudo apt-get update
sudo apt-get install git openjdk-11-jdk flex bison gperf build-essential \
zip curl zlib1g-dev gcc-multilib g++-multilib libc6-dev-i386 \
lib32ncurses5-dev x11proto-core-dev libx11-dev lib32z1-dev libgl1-mesa-dev \
libxml2-utils xsltproc unzip fontconfig python-is-python3 libncurses5
下载和编译 Android 13 源码
1. 创建源码目录
mkdir ~/android-aosp
cd ~/android-aosp
2. 切换为国内源
备份原始的源列表
sudo cp /etc/apt/sources.list /etc/apt/sources.list.bak编辑源列表
sudo nano /etc/apt/sources.list替换默认源
deb https://mirrors.tuna.tsinghua.edu.cn/ubuntu/ jammy main restricted universe multiverse
deb-src https://mirrors.tuna.tsinghua.edu.cn/ubuntu/ jammy main restricted universe multiverse

deb https://mirrors.tuna.tsinghua.edu.cn/ubuntu/ jammy-updates main restricted universe multiverse
deb-src https://mirrors.tuna.tsinghua.edu.cn/ubuntu/ jammy-updates main restricted universe multiverse

deb https://mirrors.tuna.tsinghua.edu.cn/ubuntu/ jammy-backports main restricted universe multiverse
deb-src https://mirrors.tuna.tsinghua.edu.cn/ubuntu/ jammy-backports main restricted universe multiverse

deb https://mirrors.tuna.tsinghua.edu.cn/ubuntu/ jammy-security main restricted universe multiverse
deb-src https://mirrors.tuna.tsinghua.edu.cn/ubuntu/ jammy-security main restricted universe multiverse
更新软件包索引
sudo apt update
3. 初始化 Repo
初始化 AOSP 源码仓库:
repo init -u https://mirrors.tuna.tsinghua.edu.cn/git/AOSP/platform/manifest -b android-13.0.0_r40
4. 同步源码
repo sync -c -j$(nproc) --no-clone-bundle --current-branch

5. 下载vendor
在AOSP(Android Open Source Project)源码中,vendor 目录有时可能会缺失,因为AOSP的基础源码通常只包含Android系统的核心部分和一些通用的硬件抽象层(HAL)实现。vendor 目录通常用于存放设备厂商的特定实现、定制和其他与硬件相关的代码
我们这里使用的设备是pixel 5直接去Google官方驱动下载页面下载合适的驱动,选择和下载的AOSP版本号对应的驱动:

去下载android-13.0.0_r69对应的驱动

- 将下载的压缩包解压
执行解压后的.sh文件会得到vendor目录

将vendor目录放到源码中即可

开始编译
1. 设置构建环境
source build/envsetup.sh
2. 选择目标设备
查看支持的设备列表并选择:
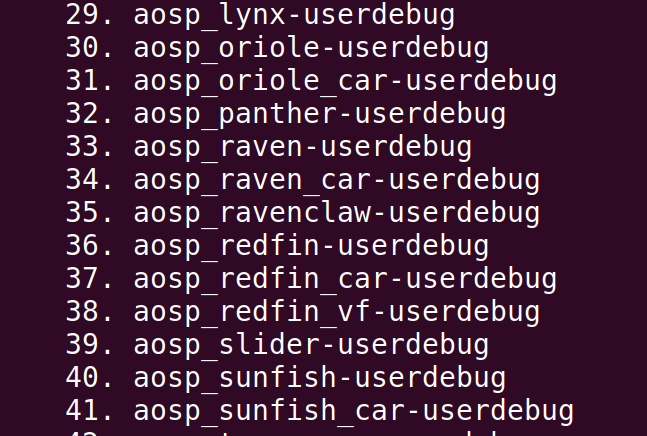
lunch

例如选择 aosp_redfin-userdebug:
36
3. 开始编译
make -j$(nproc)

- 比较花时间,编译了将近4个小时
测试和部署
启动模拟器
在编译完成后,使用以下命令启动模拟器:
emulator
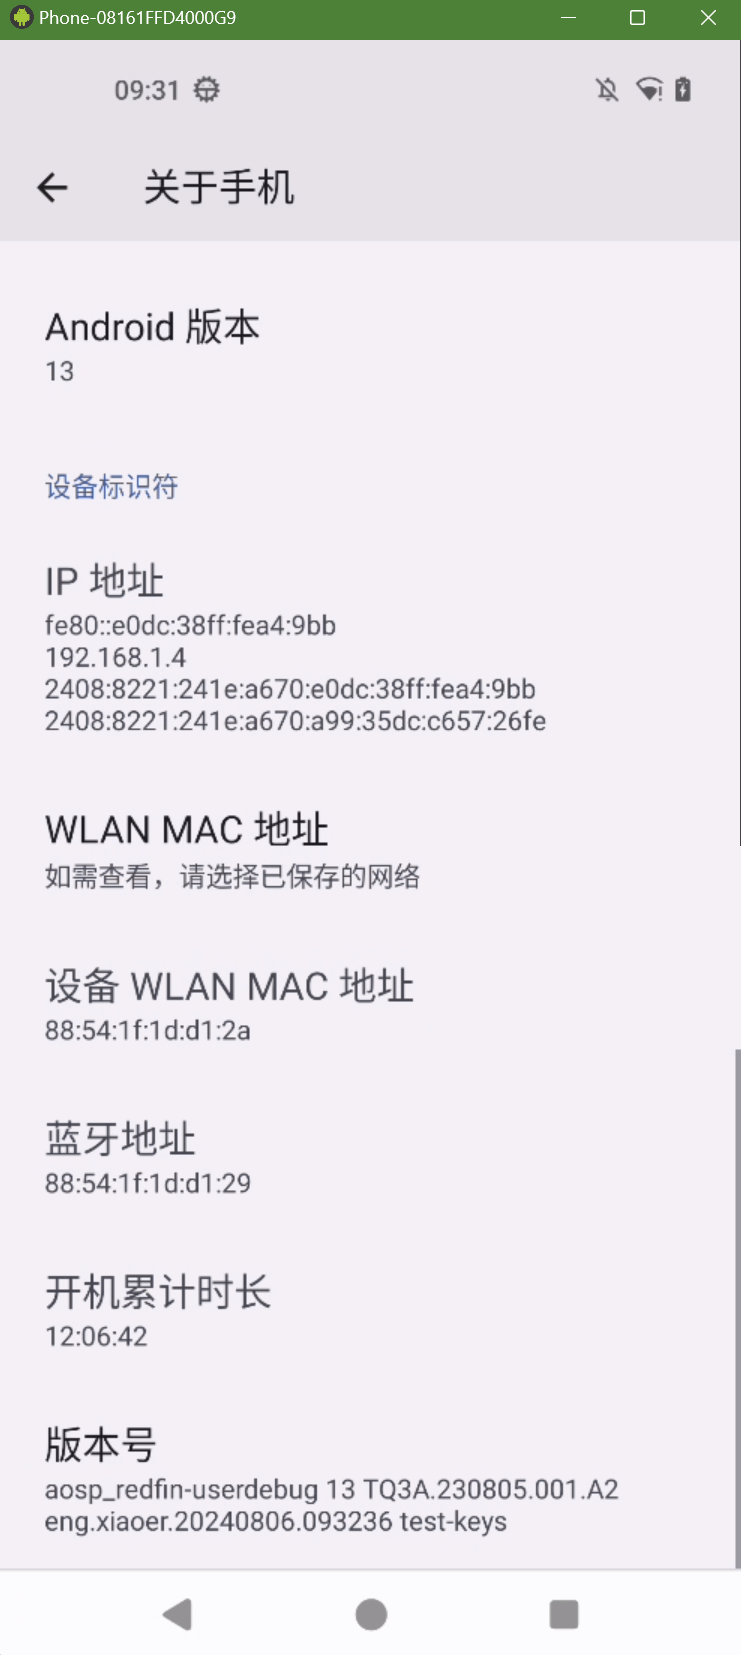
在真实设备上刷机
确保设备已连接并处于 fastboot 模式:
adb reboot bootloader
fastboot flashall -w
xiaoeryu@xiaoeryu-virtual-machine:~/aosp_r69$ adb reboot bootloader
xiaoeryu@xiaoeryu-virtual-machine:~/aosp_r69$ fastboot flashall -w
--------------------------------------------
Bootloader Version...: r3-0.5-9430389
Baseband Version.....: g7250-00247.1-230113-B-9488784
Serial Number........: 08161FFD4000G9
--------------------------------------------
Checking 'product'                                 OKAY [  0.068s]
Setting current slot to 'b'                        OKAY [  0.525s]
Sending 'boot_b' (98304 KB)                        OKAY [  3.240s]
Writing 'boot_b'                                   OKAY [  1.979s]
Sending 'dtbo_b' (16384 KB)                        OKAY [  0.670s]
Writing 'dtbo_b'                                   OKAY [  0.388s]
Sending 'vbmeta_b' (8 KB)                          OKAY [  0.140s]
Writing 'vbmeta_b'                                 OKAY [  0.079s]
Sending 'vbmeta_system_b' (4 KB)                   OKAY [  0.140s]
Writing 'vbmeta_system_b'                          OKAY [  0.079s]
Sending 'vendor_boot_b' (98304 KB)                 OKAY [  3.390s]
Writing 'vendor_boot_b'                            OKAY [  2.037s]
Rebooting into fastboot                            OKAY [  0.065s]
< waiting for any device >
Sending 'super' (4 KB)                             OKAY [  0.002s]
Updating super partition                           OKAY [  0.035s]
Resizing 'product_b'                               OKAY [  0.005s]
Resizing 'system_b'                                OKAY [  0.005s]
Resizing 'system_ext_b'                            OKAY [  0.006s]
Resizing 'system_a'                                OKAY [  0.005s]
Resizing 'vendor_b'                                OKAY [  0.005s]
Resizing 'vendor_a'                                OKAY [  0.005s]
Invalid sparse file format at header magic
Resizing 'product_b'                               OKAY [  0.006s]
Sending sparse 'product_b' 1/2 (262140 KB)         OKAY [  8.082s]
Writing 'product_b'                                OKAY [  1.405s]
Sending sparse 'product_b' 2/2 (23904 KB)          OKAY [  0.740s]
Writing 'product_b'                                OKAY [  0.179s]
Invalid sparse file format at header magic
Resizing 'system_b'                                OKAY [  0.006s]
Sending sparse 'system_b' 1/4 (262112 KB)          OKAY [  8.083s]
Writing 'system_b'                                 OKAY [  1.408s]
Sending sparse 'system_b' 2/4 (262120 KB)          OKAY [  8.204s]
Writing 'system_b'                                 OKAY [  1.393s]
Sending sparse 'system_b' 3/4 (262140 KB)          OKAY [  8.698s]
Writing 'system_b'                                 OKAY [  1.433s]
Sending sparse 'system_b' 4/4 (65600 KB)           OKAY [  2.512s]
Writing 'system_b'                                 OKAY [  0.388s]
Resizing 'system_ext_b'                            OKAY [  0.006s]
Sending 'system_ext_b' (197268 KB)                 OKAY [  7.841s]
Writing 'system_ext_b'                             OKAY [  1.075s]
Resizing 'system_a'                                OKAY [  0.006s]
Sending 'system_a' (26696 KB)                      OKAY [  0.969s]
Writing 'system_a'                                 OKAY [  0.166s]
Invalid sparse file format at header magic
Resizing 'vendor_b'                                OKAY [  0.006s]
Sending sparse 'vendor_b' 1/3 (262092 KB)          OKAY [  8.710s]
Writing 'vendor_b'                                 OKAY [  1.444s]
Sending sparse 'vendor_b' 2/3 (262116 KB)          OKAY [  8.485s]
Writing 'vendor_b'                                 OKAY [  1.411s]
Sending sparse 'vendor_b' 3/3 (236248 KB)          OKAY [  7.860s]
Writing 'vendor_b'                                 OKAY [  1.271s]
Erasing 'userdata'                                 OKAY [  6.665s]
Erase successful, but not automatically formatting.
File system type raw not supported.
Erasing 'metadata'                                 OKAY [  0.044s]
Erase successful, but not automatically formatting.
File system type raw not supported.
Rebooting                                          OKAY [  0.000s]
Finished. Total time: 1517.077s
这里使用了
-w来擦除之前分区的内容
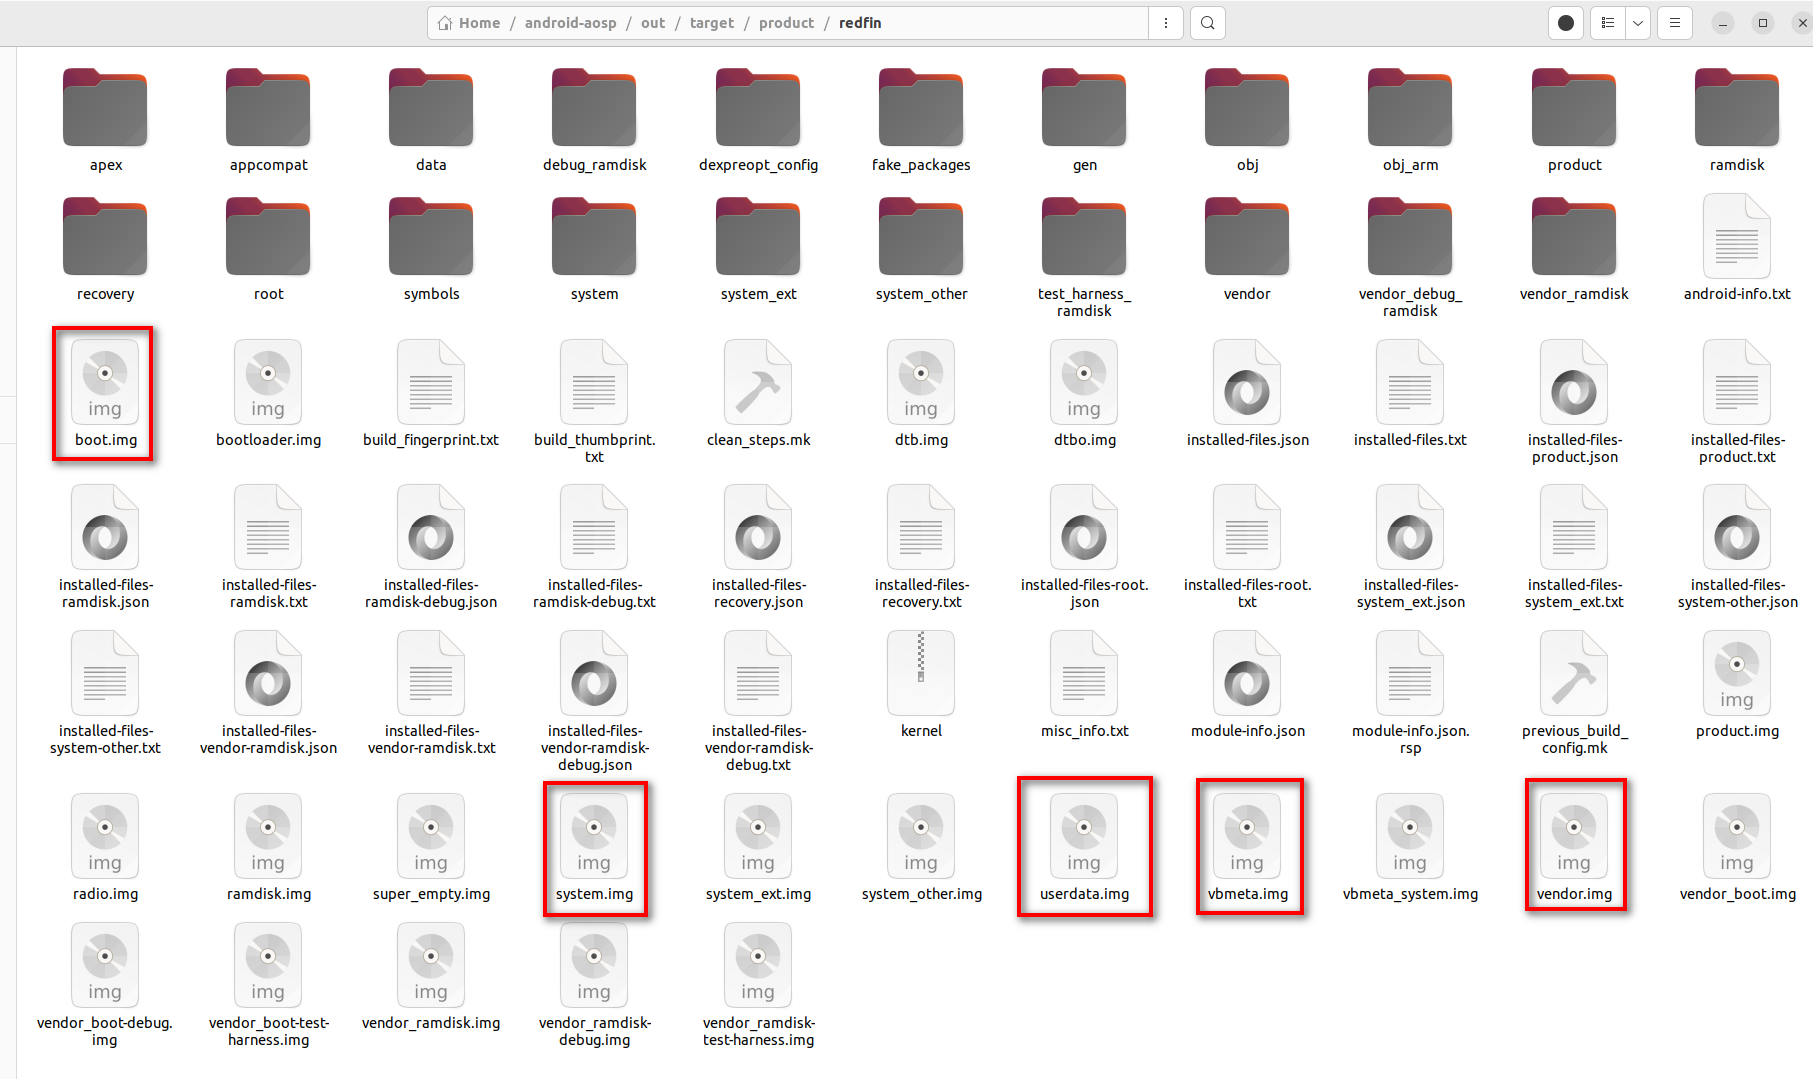
将镜像拷贝出来刷机

- 应该就是这几个,暂时没尝试回头试试再补上
fastboot flash boot boot.img
fastboot flash system system.img
fastboot flash vendor vendor.img
fastboot flash vbmeta vbmeta.img
fastboot flash userdata userdata.img
辅助工具
iftop可以监控网络接口的上传和下载速度
sudo apt install htopsudo htophtop可以监控资源进程和硬件使用情况
sudo apt install iftopsudo iftop
PS:没有vendor.img的话刷出来无法开机
参考文章:
使用Google Pixel5手机调试AOSP(代码下载、编译、刷机、调试)详细攻略
相关话题:
自己编译的安卓源码要装谷歌框架,需要刷gapp,而opengapp又比较老了,此时有一些新的选择:
